Your FoxyProxy accounts come with both proxy and VPN service.
These instructions explain how to connect to your VPN accounts using a method called IPSec. This is not the preferred method to connect to your FoxyProxy servers. If not using the FoxyProxy VPN apps or browser extensions, IKEv2 is the preferred means to connect to your VPN account.
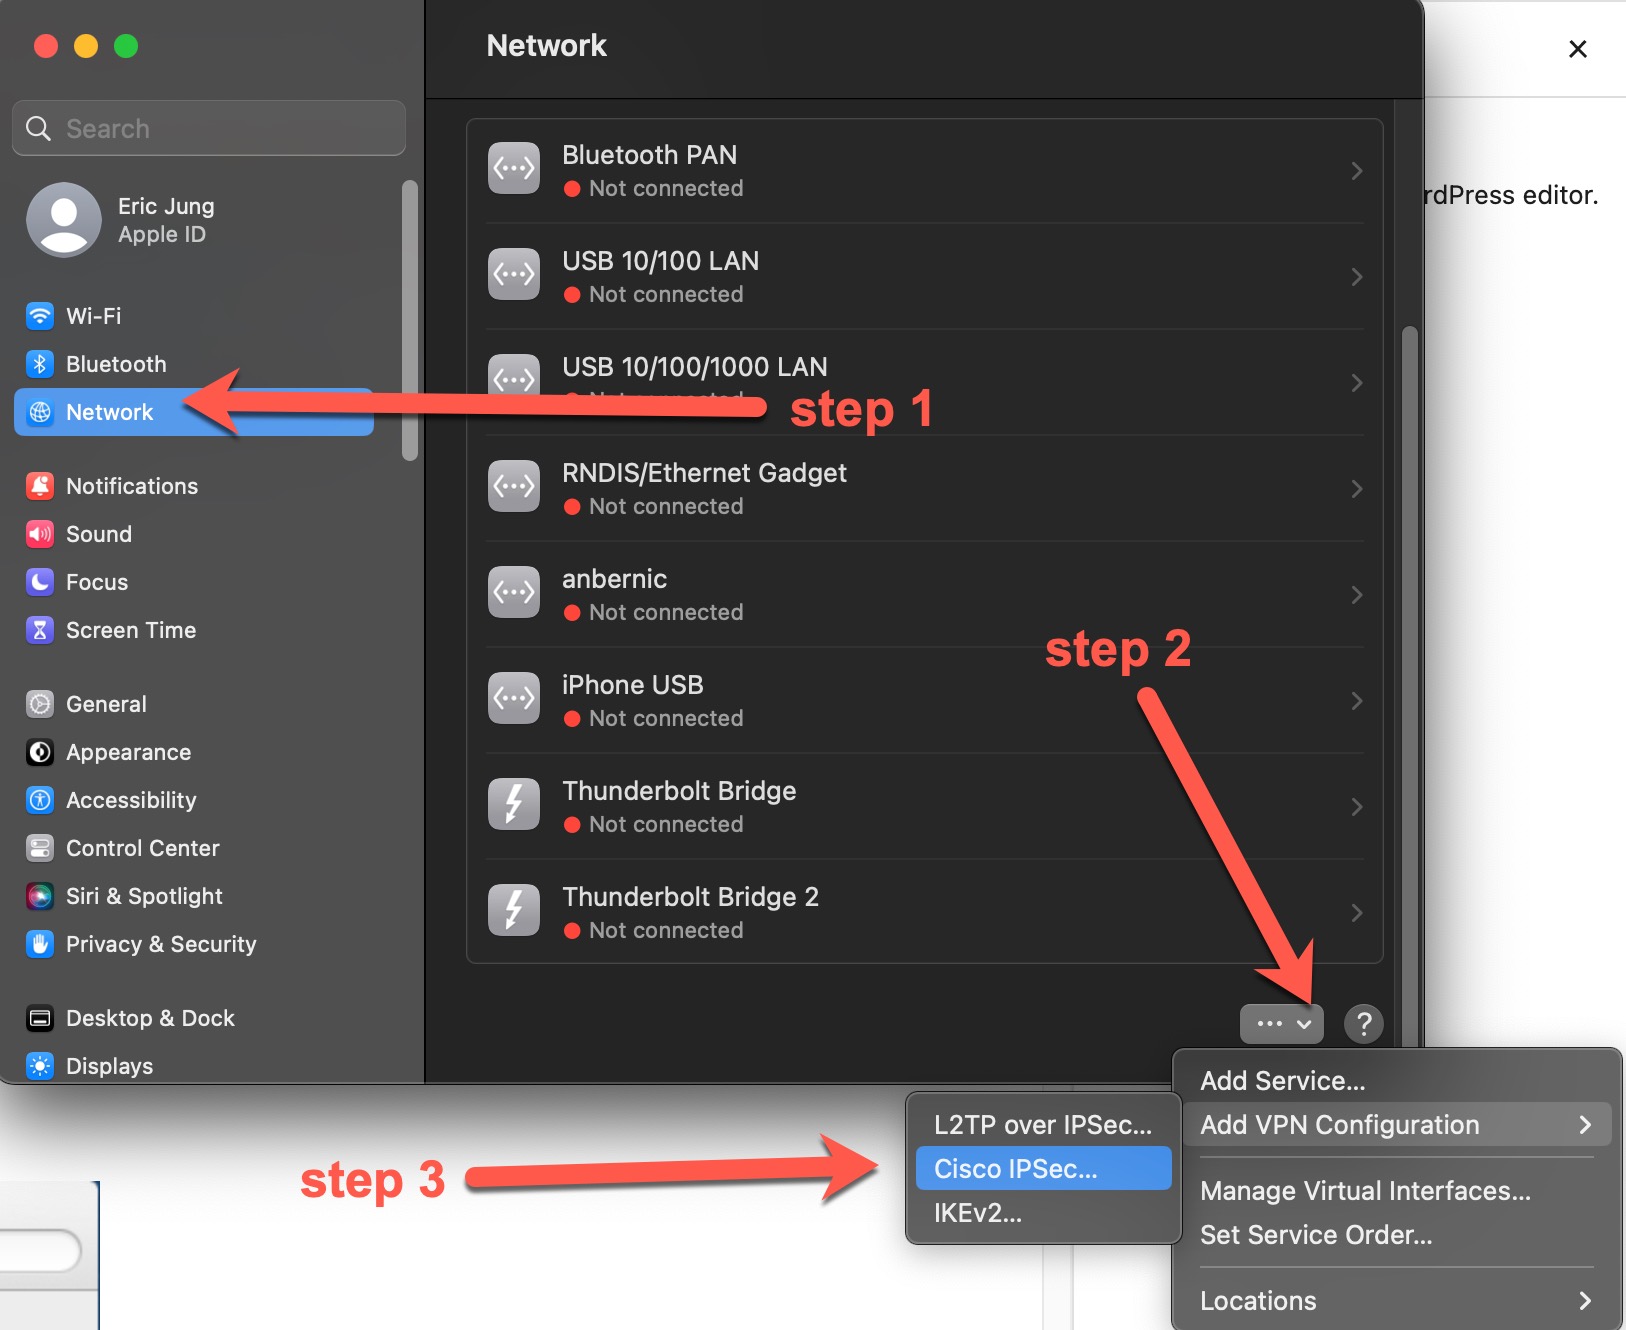
Step 1: Open ‘System Settings’, then click ‘Network’. You can find ‘System Settings’ by clicking ‘Spotlight Search’ (magnifying glass in the upper-right of your computer) and typing ‘System Settings’
Steps 2-3: click the down arrow – you may have to scroll down to see it. Select Add VPN Configuration and then Cisco IPSec…
Step 4: Enter Server Address (for example foobar.getfoxyproxy.org), Account Name (username sent to you in email and displayed during checking), and Password. Then click the Create button.
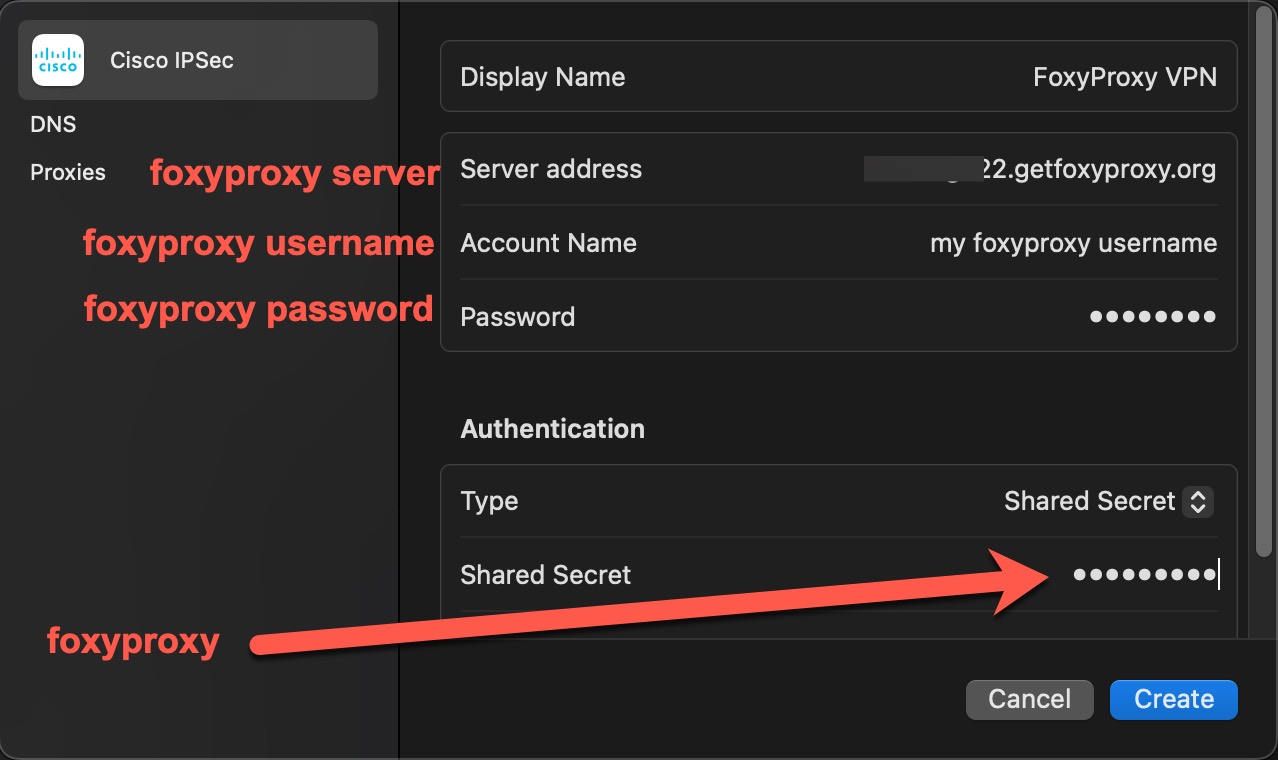
Step 5:

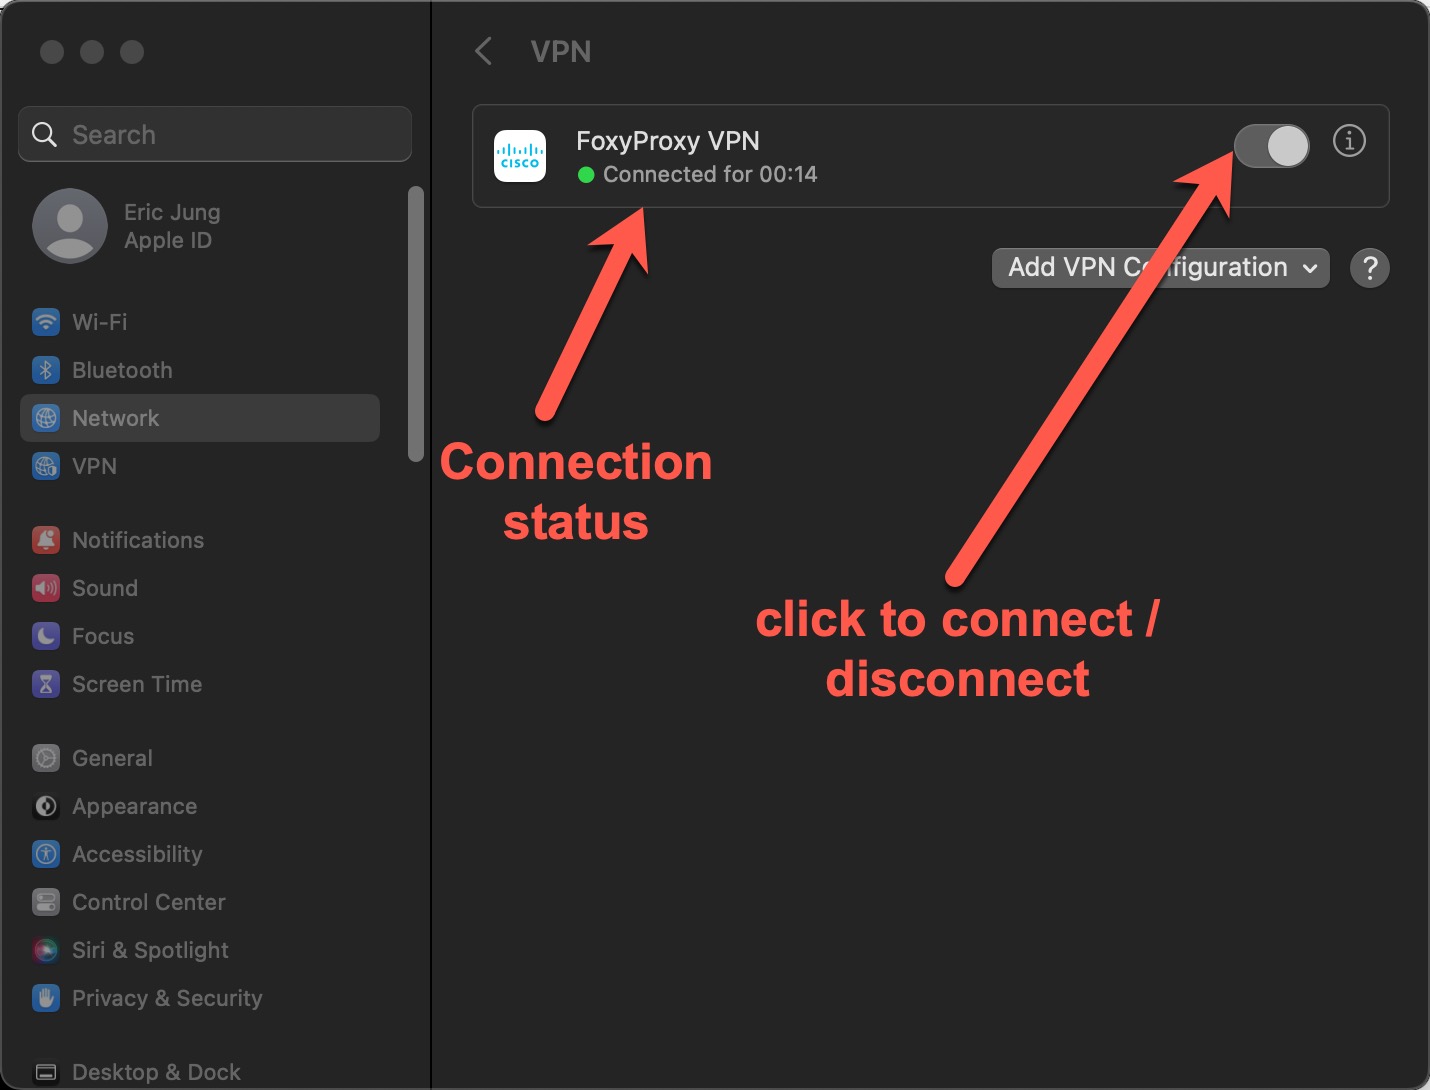
Step 7 of 7: Are you connected? Click the VPN icon in the system tray. Does it say Disconnect VPN or Connect VPN? If it says disconnect, then you are currently connected. If it says connect, then you are not currently connected.

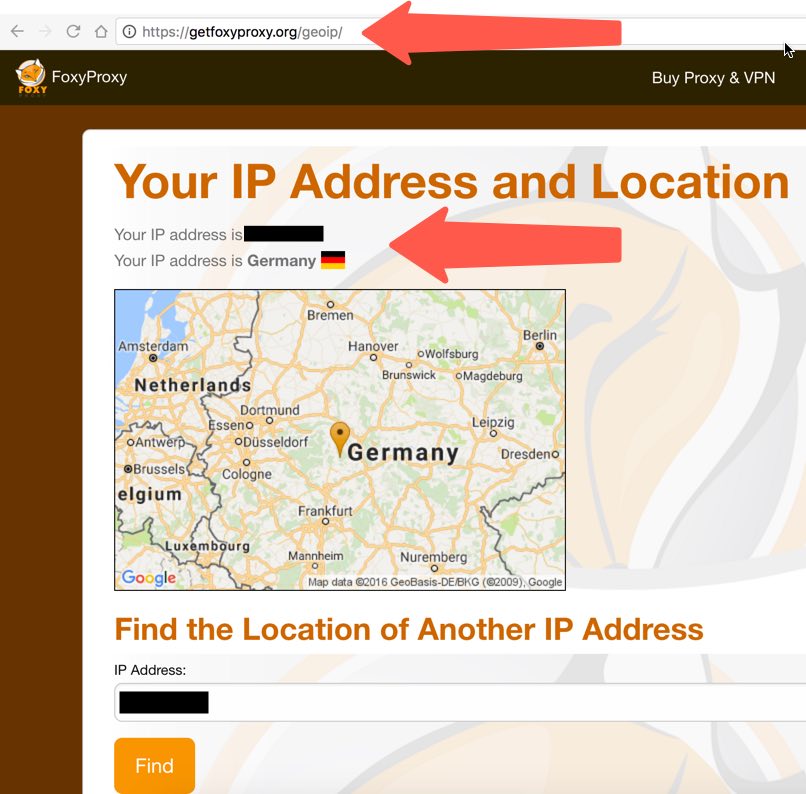
Step 8 — Extra Step: Check your location by visiting https://getfoxyproxy.org/geoip. You’ll see a page like this:
 .
.
To Quickly Disconnect and Connect
