How to Use Your Proxy Service with Chrome and without the FoxyProxy extension
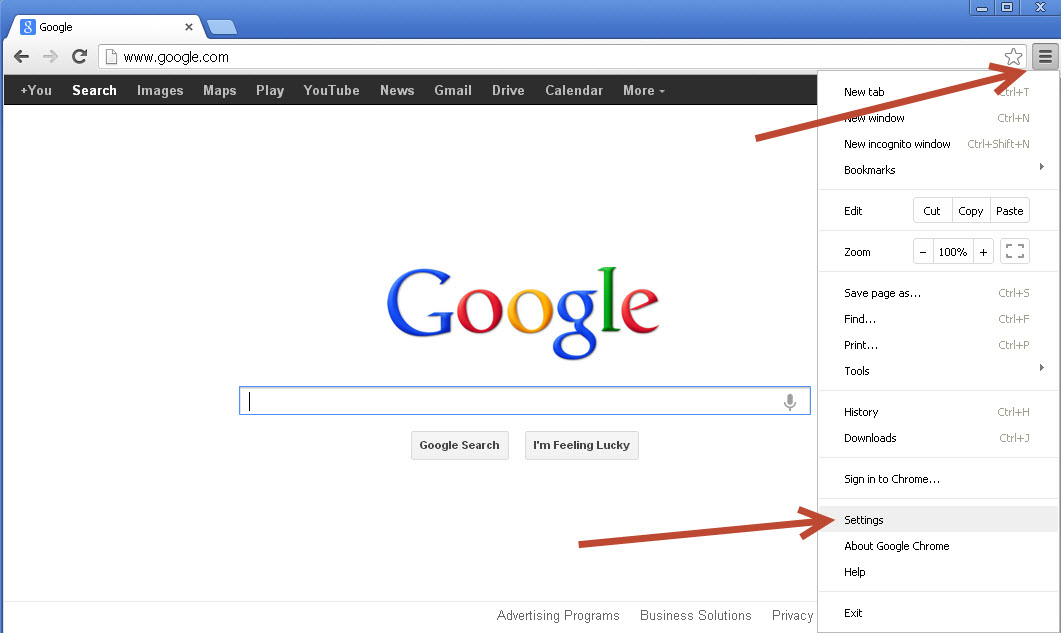
Open the Chrome Settings window . Use Preferences (⌘,) if you are using Mac
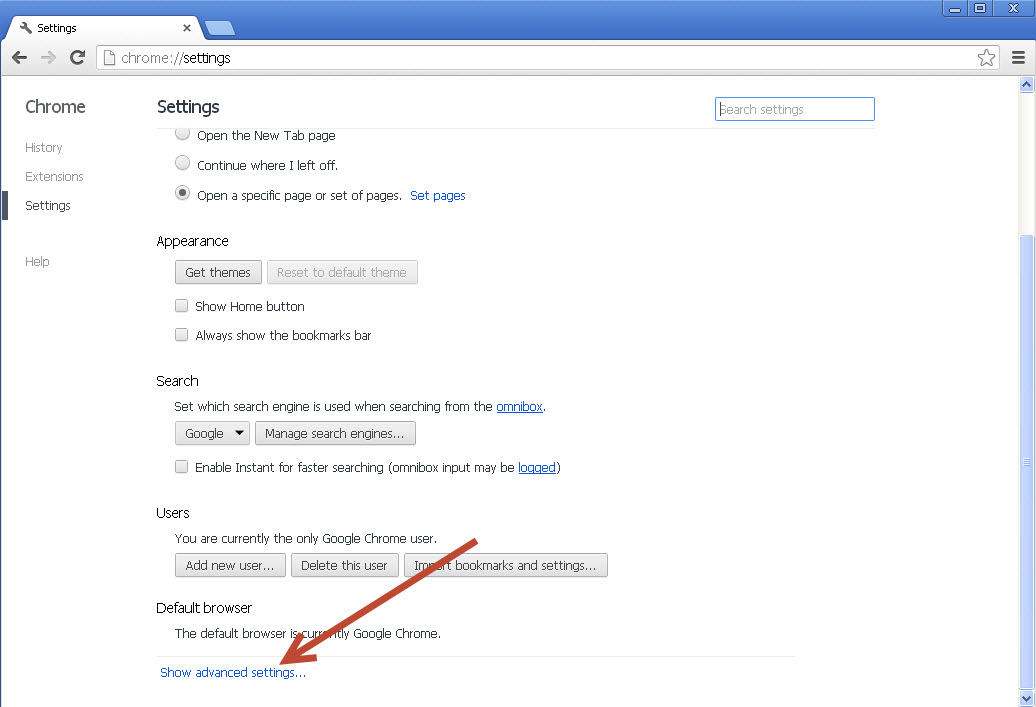
Scroll down and click “Show Advanced Settings”
Click Show Advanced Settings
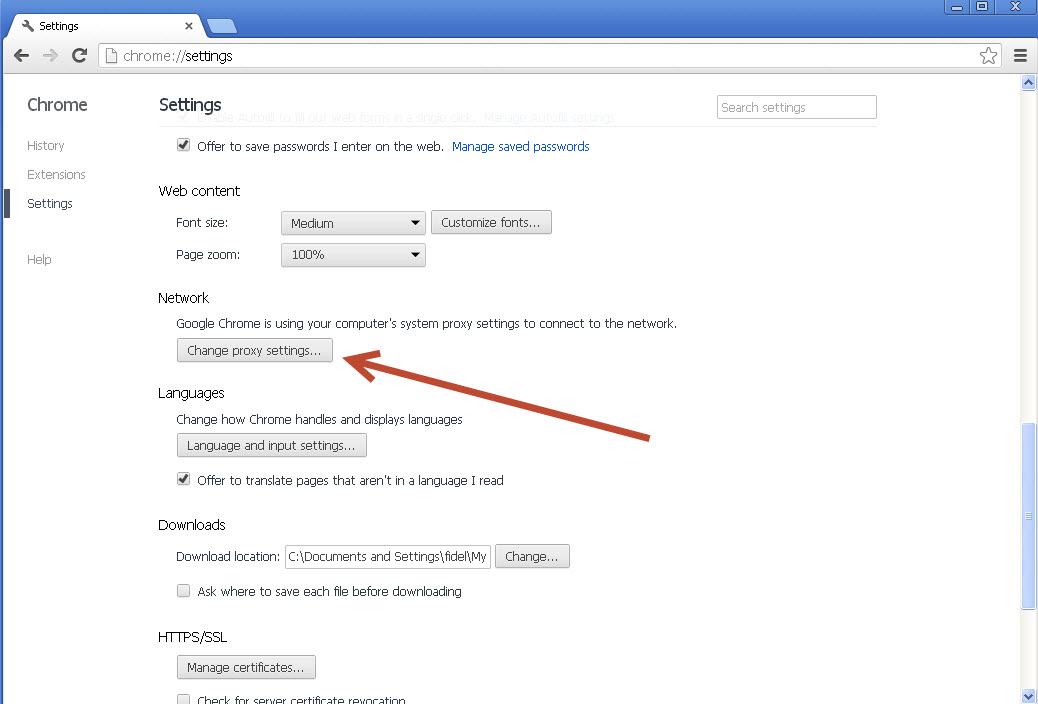
Scroll down and click the “Change Proxy Settings” button
Click Change Proxy Settings Button
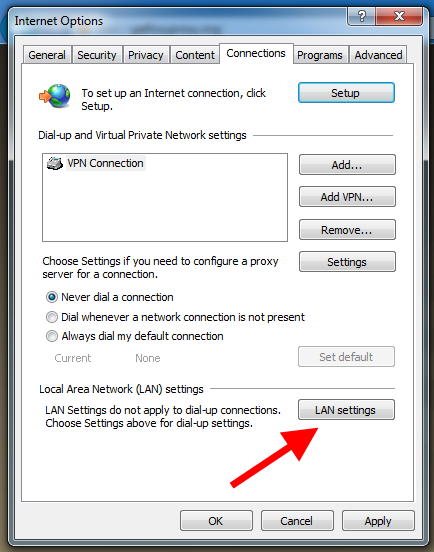
Click the “LAN Settings” button
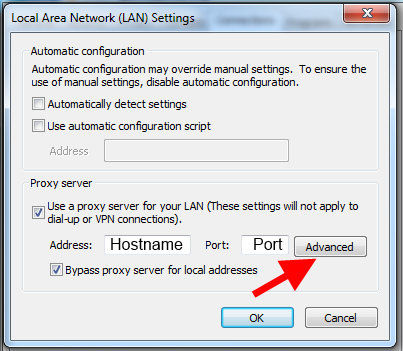
Enter the Host/IP address and Port number that was displayed at checkout and in your welcome email. Then click “Advanced ”
LAN Settings
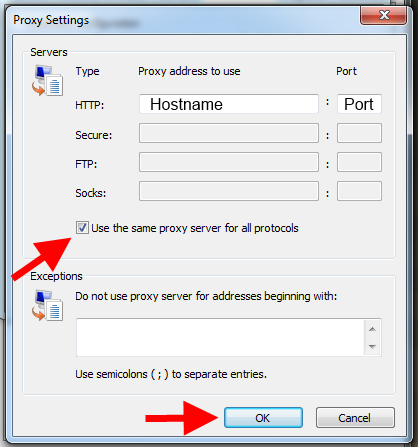
Check “Use the same proxy server for all protocols”, then click “OK”
Open Advanced Proxy Settings and check “Use the same proxy server for all protocols”
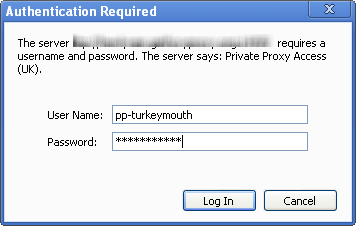
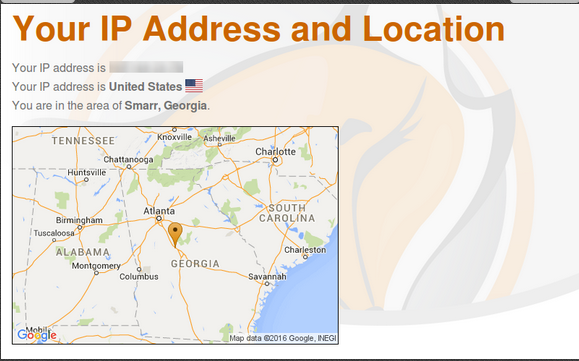
That’s it! When prompted by Chrome to enter a username/password enter the username and password provided to you at checkout. To test that you’re in the right country, click here.
To disconnect, go through steps 1-5 and un-check the “Use a proxy server for your LAN checkbox.