To Turn On The Proxy
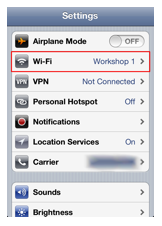
1. Go to the ‘Settings’ app an click ‘Wifi’
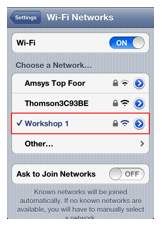
2. Click the WiFi network that you want to add a proxy. This is usually the WiFi network to which you are currently connected.
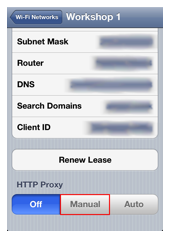
3. The next screen displays network information for the Wifi network you selected in step 2. Scroll down to the ‘HTTP Proxy’ settings and click ‘Manual’.
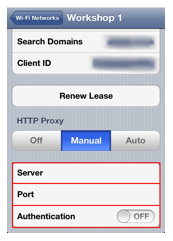
4. In the new fields, enter the proxy server address, port, username and password. These were provided to you at checkout and emailed to you. You can also retrieve them from the Control Panel. The server address will be similar to xxxxxxx.getfoxyproxy.org and the port is almost always 3128 or 13129 (both work the same). Turn on authentication and enter the username/password provided to you.
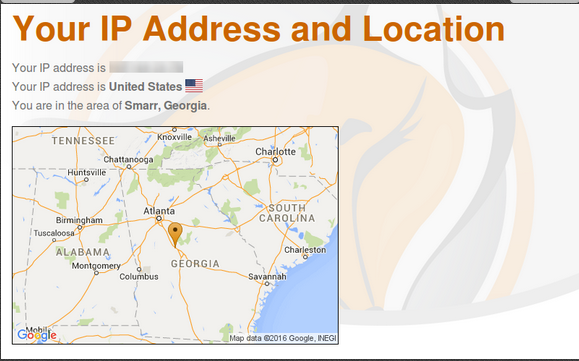
5. Exit the ‘Settings’ app. Test that everything is working properly by opening the browser and visiting https://getfoxyproxy.org/geoip. You should see the location and IP address of the proxy, not your original location and IP address.
To Turn Off the Proxy
1. Go to the ‘Settings’ app an click ‘Wifi’
2. Click the WiFi network that you want to add a proxy. This is usually the WiFi network to which you are currently connected.
3. The next screen displays network information for the Wifi network you selected in step 4. Scroll down to the ‘HTTP Proxy’ settings and click ‘Off’.