Your FoxyProxy accounts come with both proxy and VPN service.
These instructions explain how to connect to your VPN servers using OpenVPN. It is more complicated to setup than IKEv2 and IPSec because it requires 3rd-party client software and a configuration file for each VPN server.
TunnelBlick and OpenVPN Client are two free OpenVPN clients. You must download and install one of them to use the OpenVPN protocol with you FoxyProxy VPN servers. These instructions use TunnelBlick.
Step 1: Download the app called TunnelBlick here
a. This downloads Tunnelblick_8.0_build_6300.dmg to your computer. Click on it to start the installer.
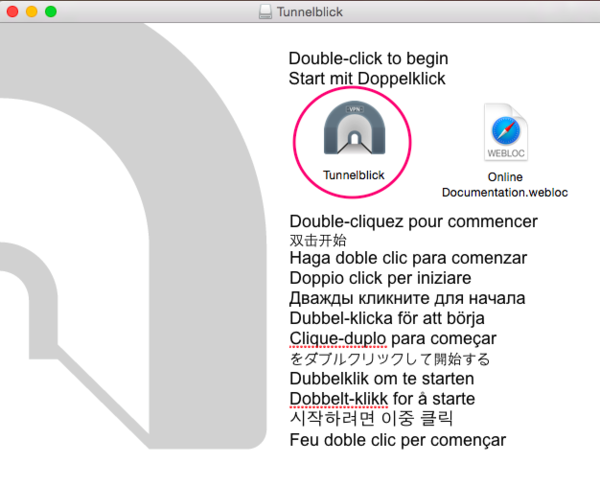
b. The package window will open revealing the installer. Double-click the Tunnelblick.app icon to begin installation.
The package window will open revealing the installer.dmg
Step 2: Launching Tunnelblick
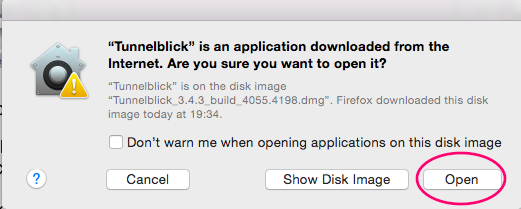
a. A dialog box warning you that the application was downloaded from the internet and requiring your approval to continue. Click on Open.
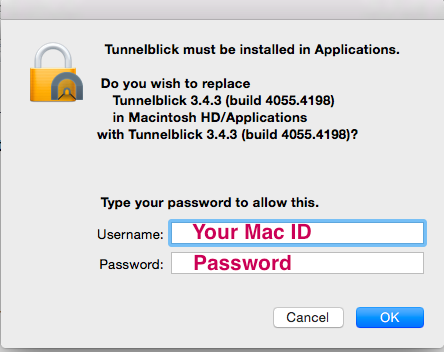
b. An approval of the installation by entering your Mac username and password. Type your username and password, and then click OK.
c. The installation will complete. You’ll then see a dialog asking you if you want to launch Tunnelblick now. Click on launch to start Tunnelblick.
Step 3: Add a configuration
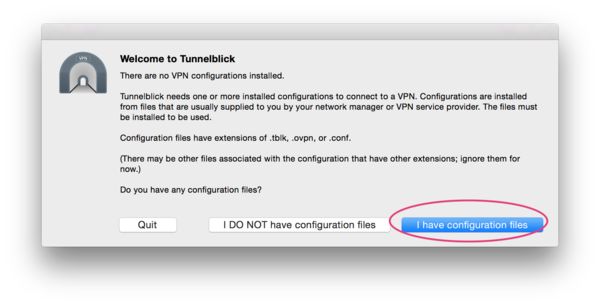
a. A dialog box that says “Welcome to Tunnelblick” appears. This dialog is designed to help you get started with Tunnelblick configuration. Since FoxyProxy provides you with the configuration files to use Tunnelblick, you can click the “I have configuration files” button.
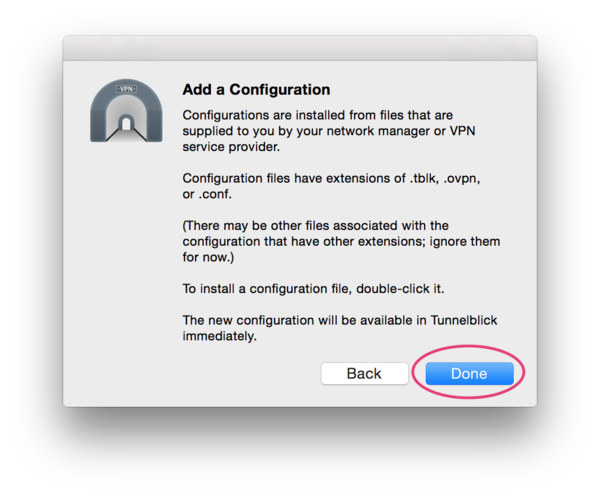
b. Simply click the “Done” button here.
3) You’ll see the Tunnelblick icon appear in the status window next to your username and the Spotlight icon. (Right corner of the screen)
Tunnelblick icon
Step 4: Download and Install OpenVPN configuration
a. From the FoxyProxy Control Panel, go to the Actions menu and download the OpenVPN configuration file. If you have many servers, there is an option to download all config files as a zip archive at the top. Look for the text “Click here to download all Tunneblick/OpenVPN files as zip.” If you have any trouble downloading the files, contact FoxyProxy Support and we’ll be glad to email it to you.
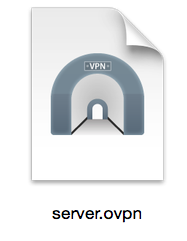
Double-click the file (*.ovpn) to install it into TunnelBlick. If you get an error from TunnelBlick, first quit TunnelBlick (click icon in status area and select Quit TunnelBlick) then double-click the *.ovpn file.
Your file won’t be called server.ovpn, but it will have the .ovpn file extension.
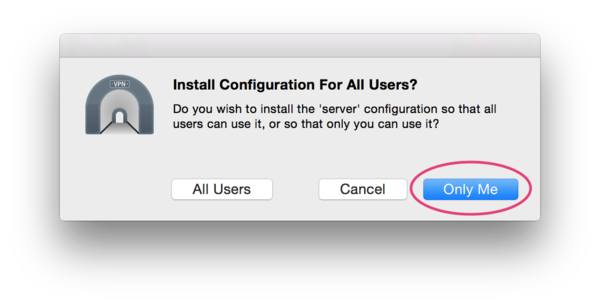
b. In the dialog box, select “Only Me” when choosing which users to allow to use this OpenVPN configuration.
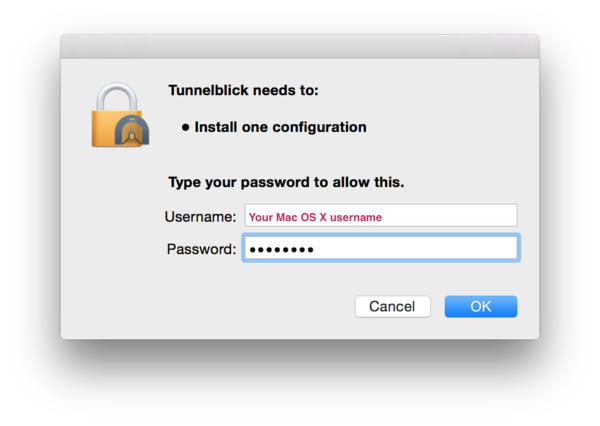
c. Enter your Mac OS X username and password to authorize installing the OpenVPN configuration.
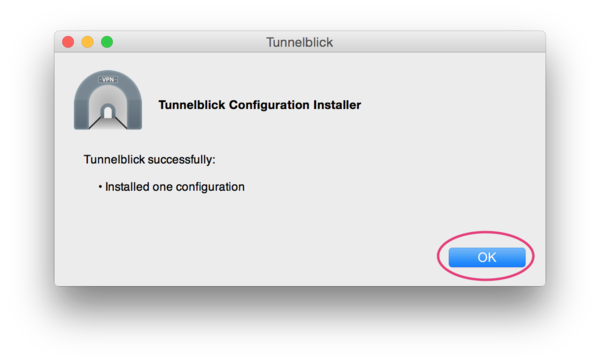
d.You should receive a notification that the profile was installed successfully. Click OK.
Step 5: OpenVPN settings
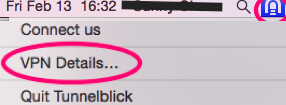
a. Click the Tunnelblick icon in the status area and select VPN Details.
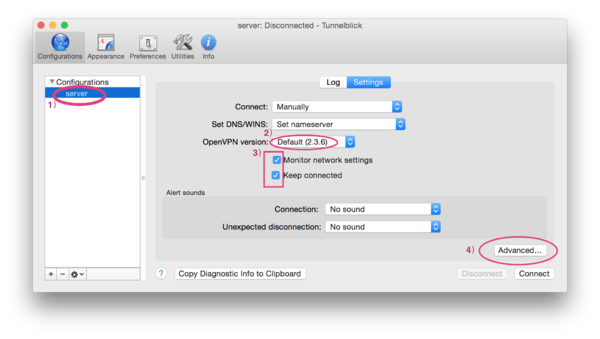
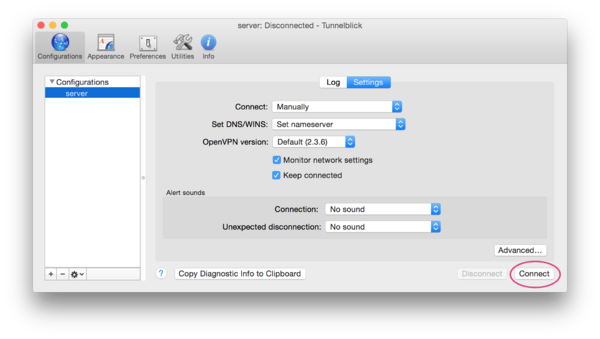
b. In the main Tunnelblick interface, make sure the Server profile is selected. Set the OpenVPN version to 2.3.6. Make sure the “Monitor network settings” and “Keep connected” checkboxes are checked. Click the Advanced button at the bottom.
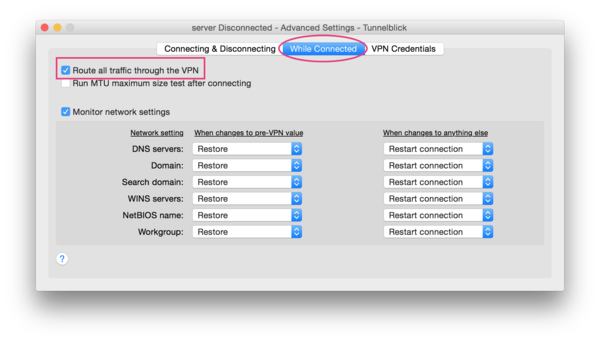
c.In the profile’s Advanced Settings dialog, select the “While Connected” tab. Check the “Route all traffic through the VPN” checkbox. Then close the Advanced Settings.
Step 6: Connect to OpenVPN
a. There are two ways to connect to the OpenVPN server.
One way is in the main Tunneblick dialog box. You can click the Connect button there:
The other way is to click the TunneBlick icon in the status area and select Connect Server.
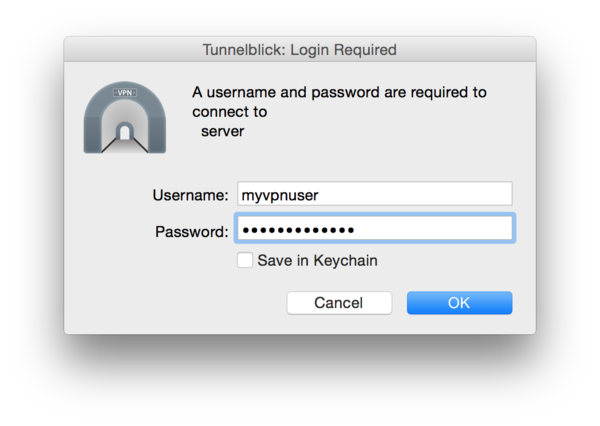
b. You will be prompted to provide your OpenVPN username and password. These are the credentials provided to you by FoxyProxy. You can choose to save the credentials in the keychain if you wish.
c. After providing your credentials, you should see a series of screens next to the TunnelBlick icon in the status area. It should end with “Connected” in a GREEN text color. The connection can take up to 30 seconds to complete.
Confirm You’re Connected
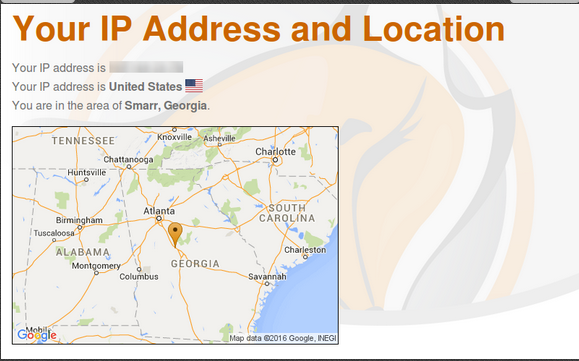
To confirm you’re connected to the VPN, visit https://getfoxyproxy.org/geoip and ensure it shows a different location and IP address than you expect.
Disconnecting
Click the OpenVPN icon in the status area and select “Disconnect”.
