The preferred way to use your FoxyProxy VPN servers is with the FoxyProxy Windows VPN App. If you cannot use that, these setup instructions for IKEv2 on Windows are much easier than this article which covers OpenVPN. IKEv2 is easier because it uses built-in a Windows VPN client and does not need any configuration files. OpenVPN requires a 3rd-party client installation and one configuration file per VPN server.
If you want to continue with OpenVPN anyway, download and install the OpenVPN windows client from here. Once installed, follow these steps:
1. Download the OpenVPN configuration file from the ‘Actions‘ menu in the FoxyProxy customer panel here. If you have many servers, there is an option to download all as a zip archive at the top. Look for the text “Click here to download all Tunneblick/OpenVPN files as zip.”
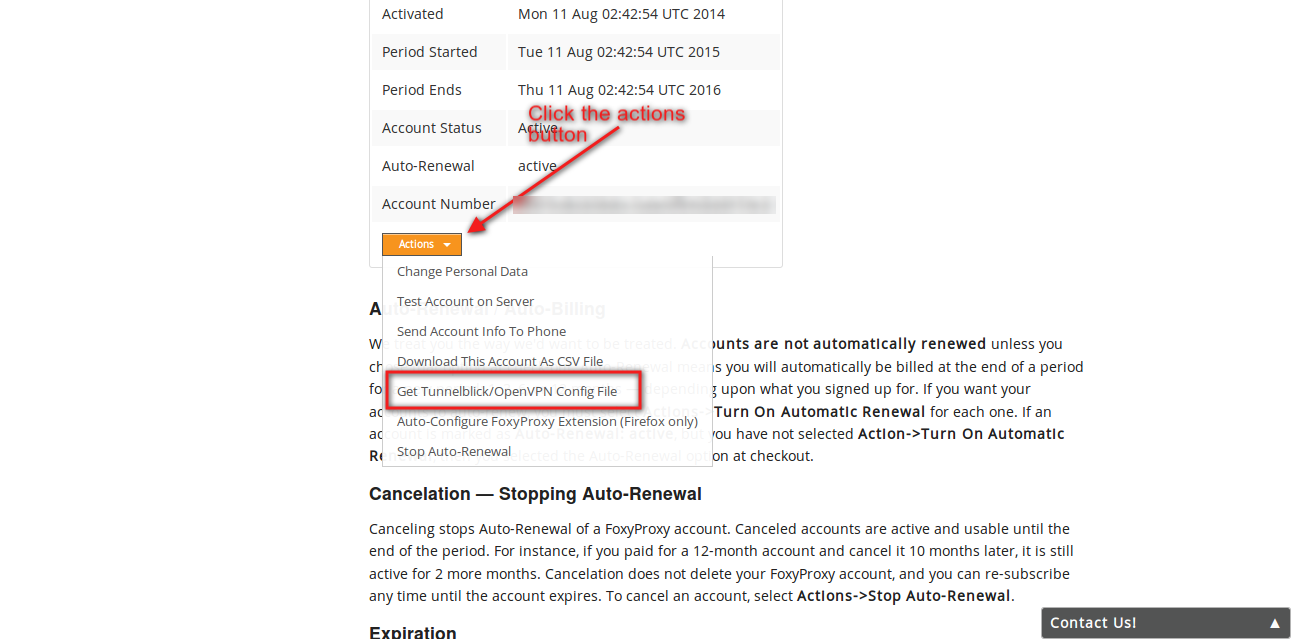
If you have any trouble downloading the configuration file, contact FoxyProxy Support and we’ll be happy to provide it.
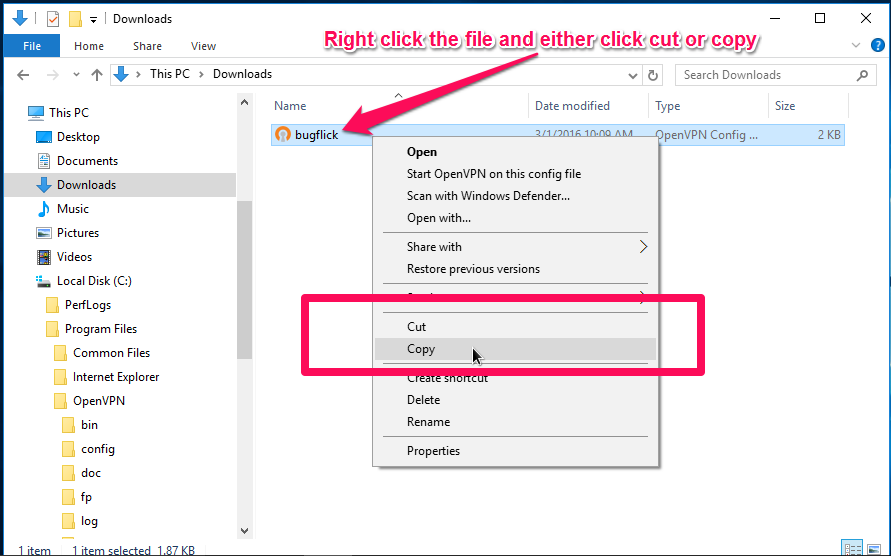
2. Copy the downloaded OpenVPN configuration file to the OpenVPN config folder. To do this, right click the configuration file and click “Copy”
3. Open the OpenVPN configuration folder. It is usually located under This PC->Local Disk(C)->Program Files->OpenVPN->config
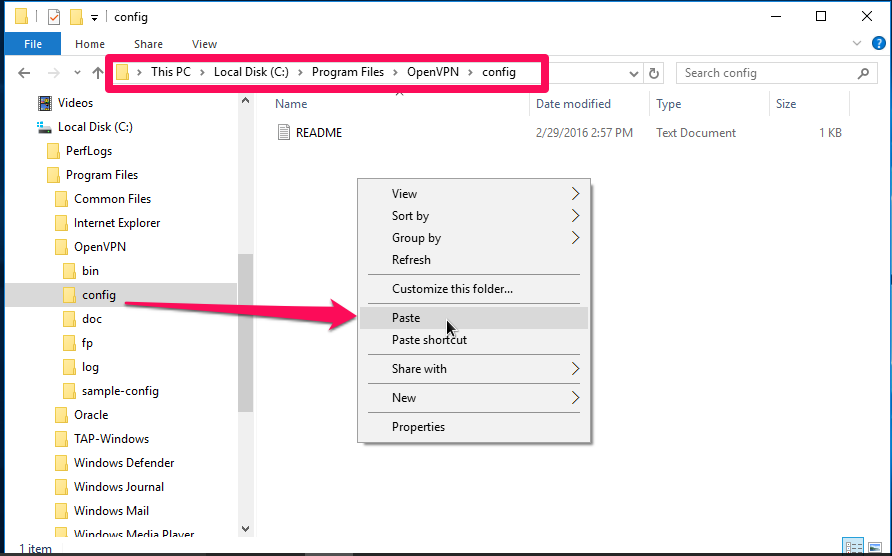
4. Once you have navigated to the folder, right click inside the folder and click “Paste” in the context menu. This will copy your OpenVPN configuration to the OpenVPN program. Doing this is essentially “telling” the OpenVPN program what server you want it to connect to.
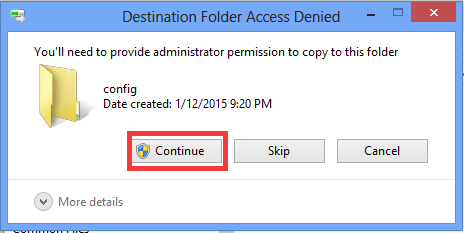
5. Click Continue to authorize saving the configuration file into this directory.
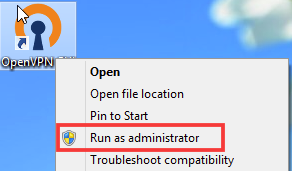
6. Right click the OpenVPN GUI icon on your Desktop and select Run as Administrator.
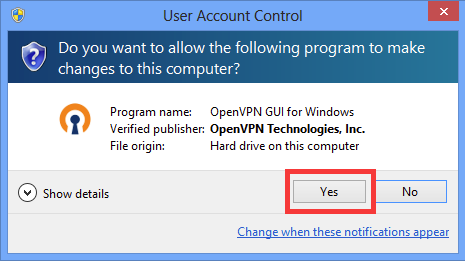
7. Windows will prompt you to authorize changes be made to your computer. Select Yes:
8. The OpenVPN icon will appear in your tray:
![]()
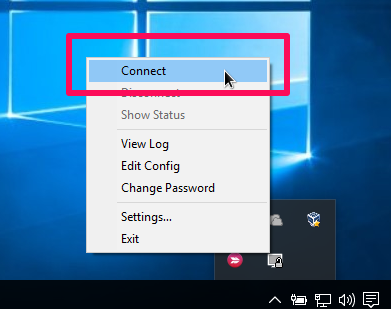
6. Once the configuration file has been successfully copied and the OpenVPN app given permission to make changes to your computer, right click on the OpenVPN icon in your system tray and click connect:
![]()
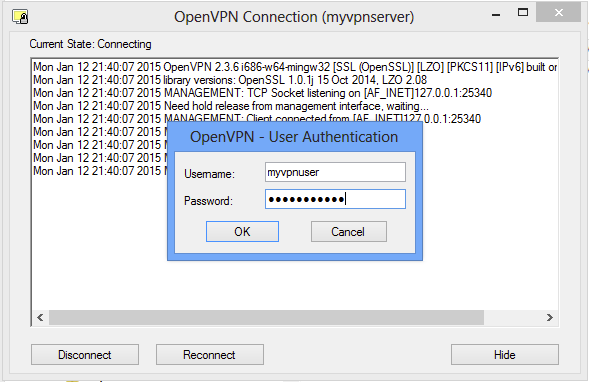
7. The OpenVPN connection status log window will open and prompt you for your username and password. Enter the credentials provided to you in your welcome e-mail, then click OK.
8. You’ll know the connection was successful because you’ll see a status message stating “Successful ARP flush on interface” at the bottom of the log. The status window will then close soon after.
9. You may see a status bubble appear from the tray icon indicating a successful connection to the OpenVPN server.
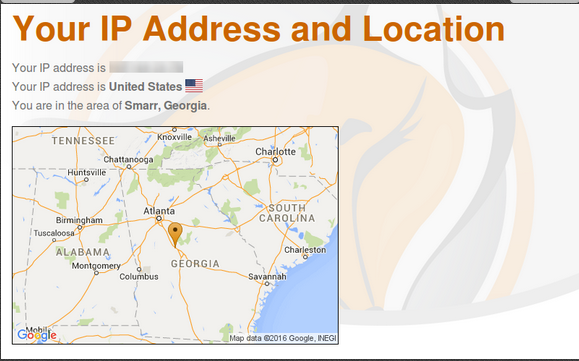
10. Test browsing to http://getfoxyproxy.org/geoip to confirm your IP address is that of the OpenVPN server.
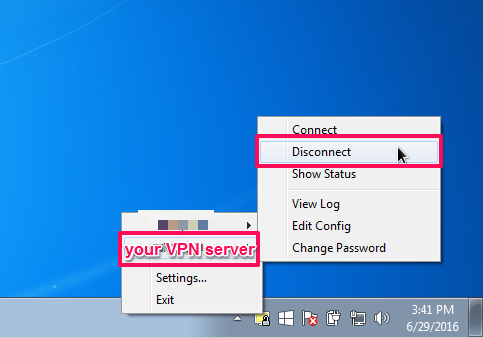
To disconnect from the VPN, right click the OpenVPN icon in the taskbar, point the cursor to your VPN connection and click “Disconnect”