If you have many OpenVPN files, try bulk importing them instead.
Step 1: Download OpenVPN Configuration files from FoxyProxy
If you don’t already have OpenVPN config files for your FoxyProxys servers, download them from the FoxyProxy Control Panel. Login and select “Click here to download all Tunneblick/OpenVPN files as zip.” If you have any trouble downloading the files, contact FoxyProxy Support and we’ll be glad to email it to you.
Unzip the files. They files are used in Step 4.
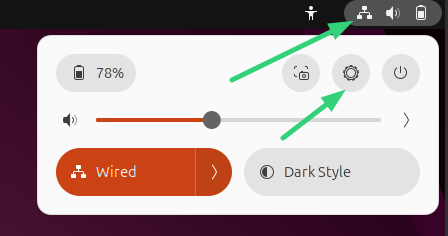
Step 2: Open Settings -> Network
There are several ways to do this. Here is one. Click the network icon in the taskbar, then the gear icon. See the green arrows in this screenshot.
Network settings can also be opened from the desktop Show Apps icon and then searching for Settings.
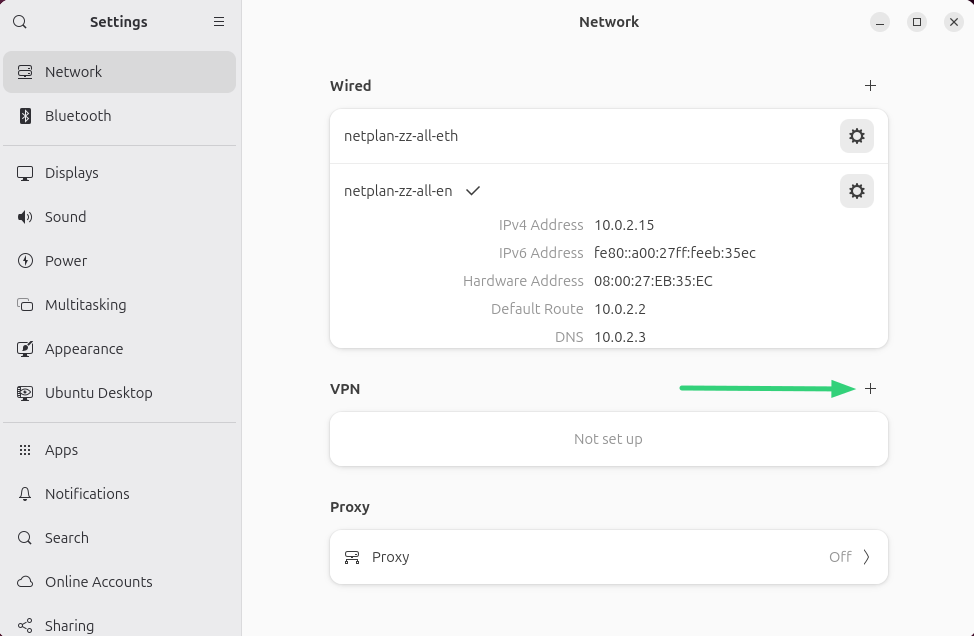
Step 3: Add a new VPN connection
Click the + symbol next to VPN:
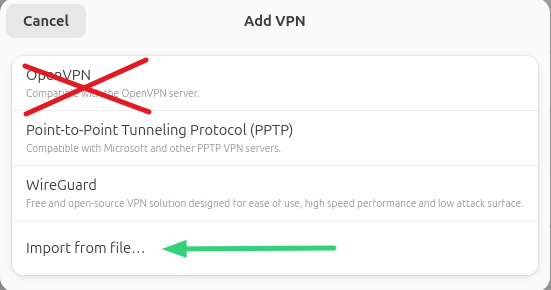
Click Import from file… not OpenVPN.
Step 4: Import the OpenVPN conf files
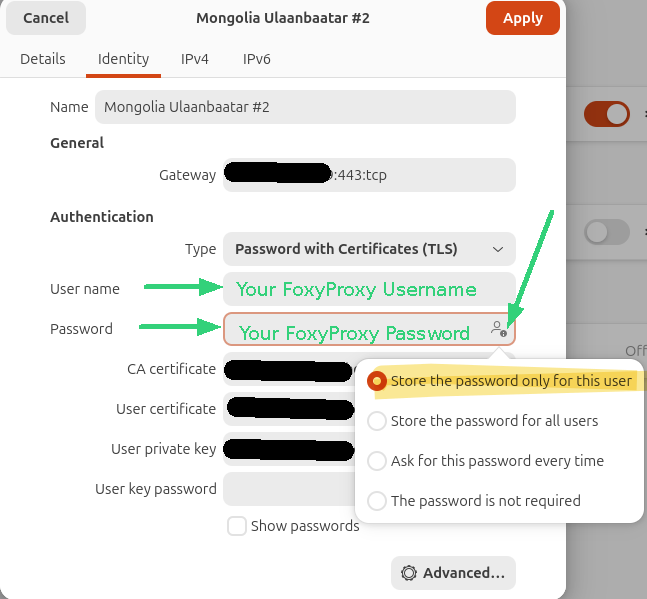
Select one of the .ovpn files from Step 1. Enter your FoxyProxy username and password. Click the icon at tthe end of the password field and choose Store the password only for this user. If you do not choose this, you may be prompted for the password every time your connect to the server. You can optionally change the Name to something else, if you like. Click the red Add button.
Step 5: Connect / Disconnect
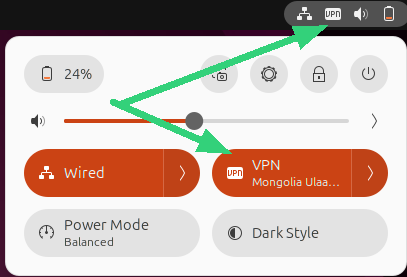
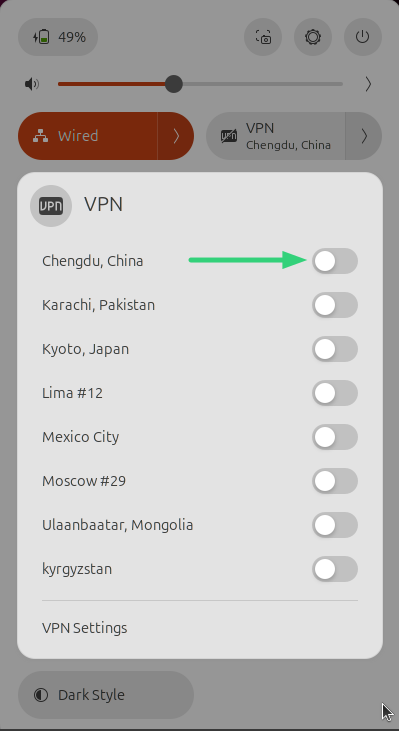
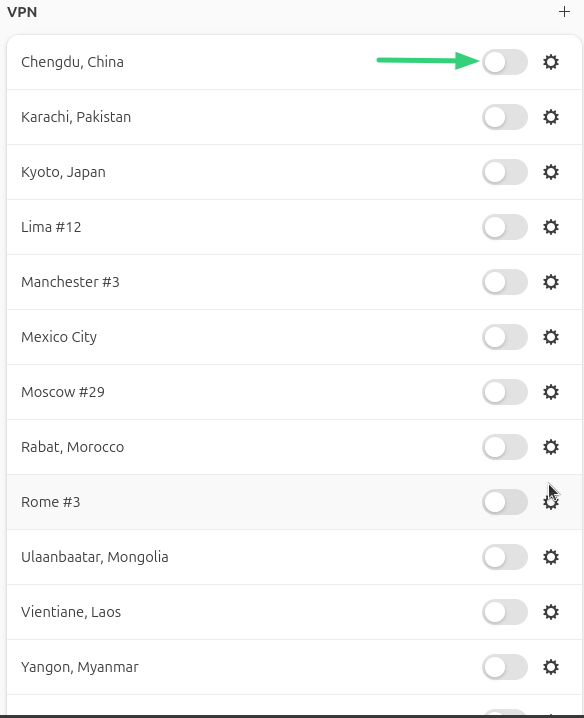
Connect or disconnect through the Network Settings screen or the network icon in the taskbar. If you have many servers, not all of them may appear in the taskbar list. However, the Network Settings screen shows all VPN servers:
Network Settings (complete list):
If the connection succeeds, look for the VPN icon in the task bar. You can click it to see which VPN connection is active: