Your FoxyProxy accounts come with both proxy and VPN service.
These instructions explain how to connect to your VPN accounts using a method called IPSec. Only do this if you cannot use our FoxyProxy Android app.
These instructions are for Android 4. They also work with other versions, but the screens are a little different.
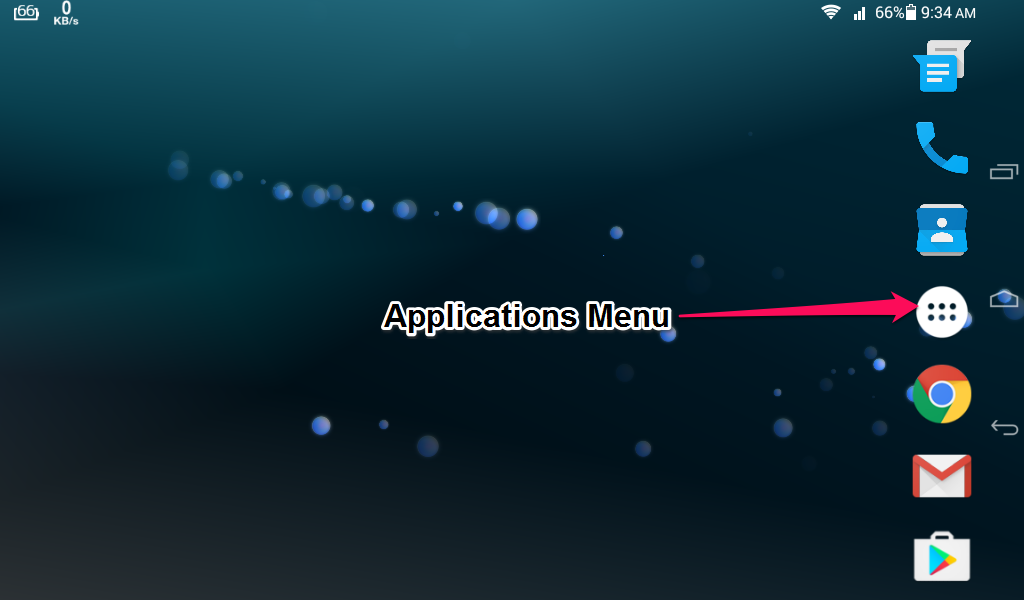
1. Click the Applications Menu button then click Settings
2. In the Settings screen, go to WIRELESS & NETWORKS and click the <strongmore…< strong=””> button. Next, click on the VPN button to setup the VPN.
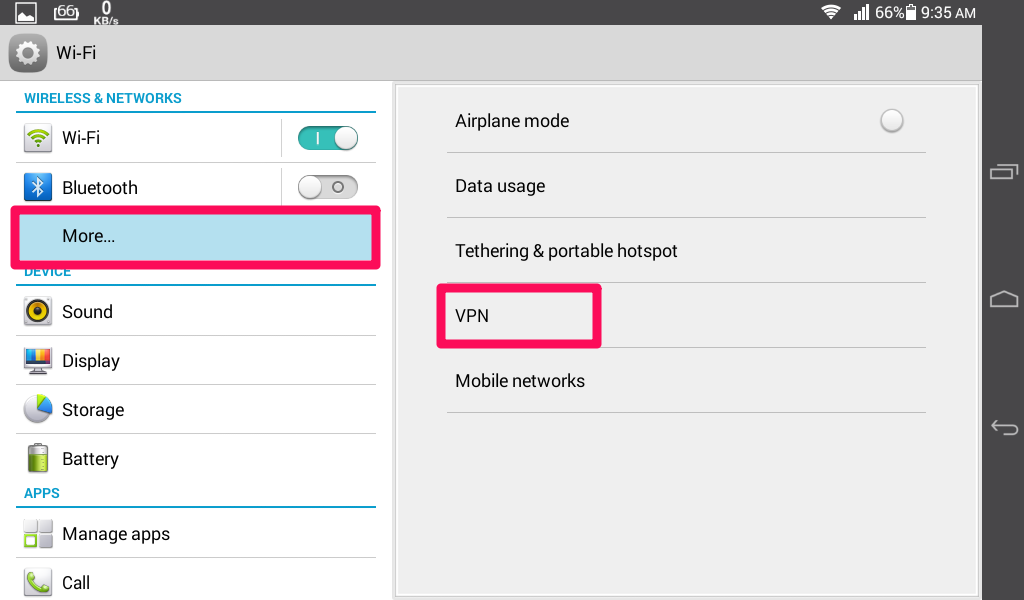 </strongmore…<>
3. Click the + button.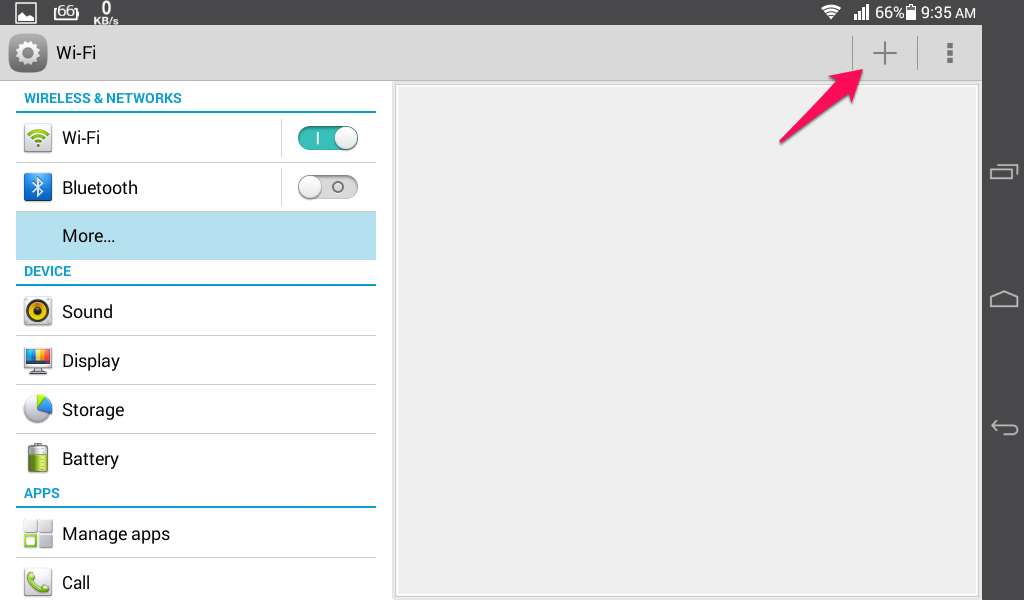
4. Enter the following information:
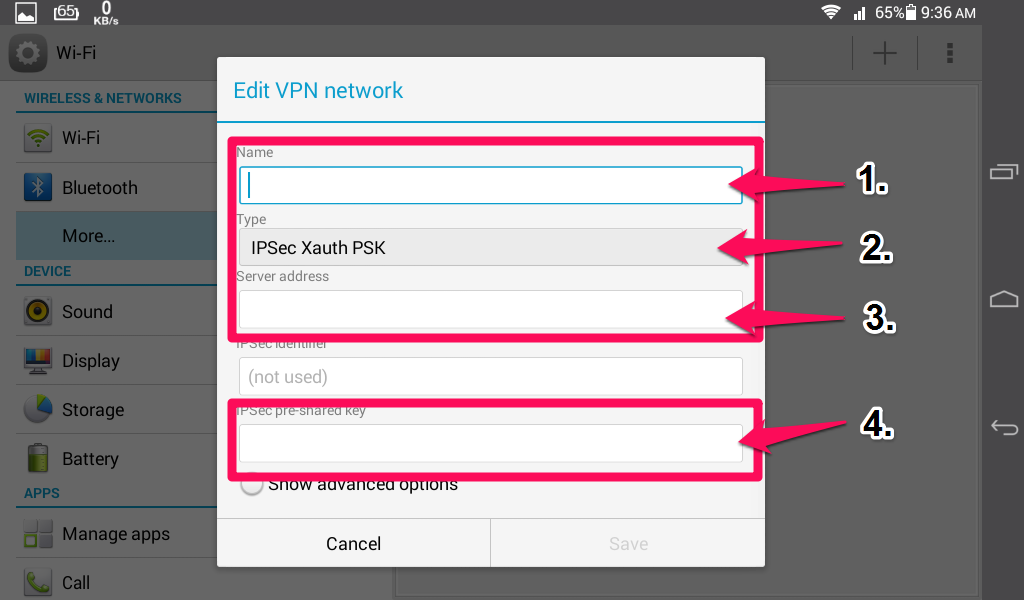
1. Name – You can type anything here. For example, “Argentina VPN”
2. Type – Select IPSec Xauth PSK
3. Server Address – Your FoxyProxy Server Name or IP Address
IPSec Identifier – leave blank/empty
4. IPSec Preshared key – Type “foxyproxy” without the quotes.
Click Save to permanently store the IPSec VPN Connection.
5. Click on the VPN connection you created to connect to it.
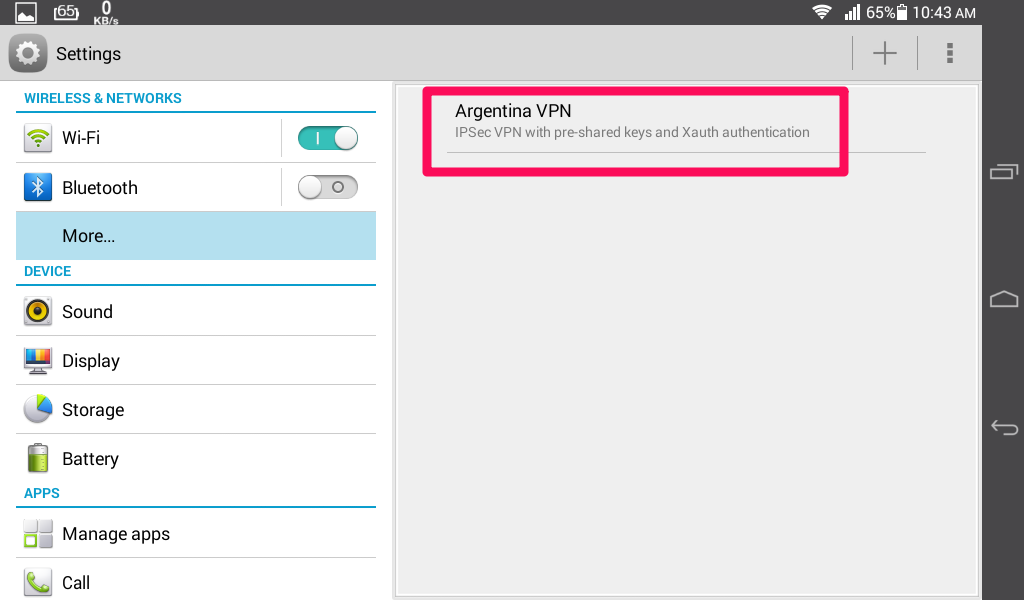
You will be prompted to enter your FoxyProxy username and password.

6. If the connection is successful, you should see this screen:
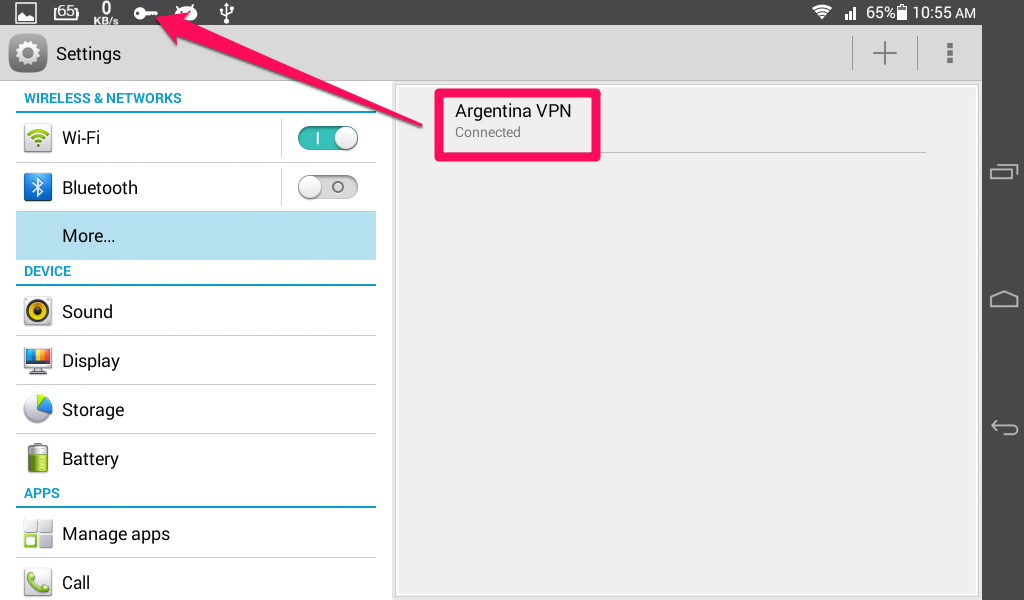
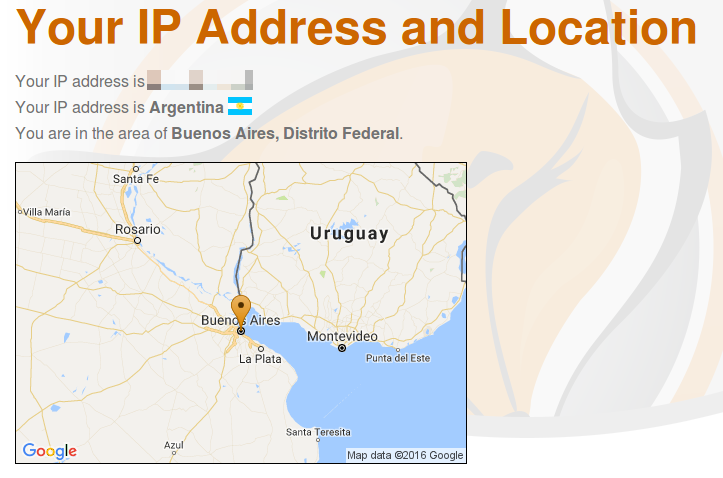
7. To confirm that everything is working, visit https://getfoxyproxy.org/geoip/ and ensure it says a different IP address from what you expect.